
Xibo for Android
On this page
Installation Guide
Xibo for Android is released as a standalone “APK” installer file and is available from the Downloads section.
Once downloaded, Xibo for Android is easy to install and configure and can be up and running in just a few minutes.
Please note: The use of Xibo for Android is included in all Plans and has no separate licensing requirement. The required Licence information field is completed automatically to connect the Player to the CMS.
Customers with Independent Pricing not on a plan are required to purchase a Xibo for Android software Licence for each device you intend to run which is then linked to a Licence Pool.

This guide will take you through each step in detail for the required installation, which includes the following stages:
- Preparing your device
- Downloading Xibo for Android APK
- Installation of Xibo for Android APK
- Connecting to your CMS
- Authorising your Display
- Activating your Licence
Prepare your device
Non-market Sources
Xibo for Android is a non-market Android application, which means the device will need to be configured to allow the installation of applications from unknown sources. This setting is found in the “Security” or “Applications” section of the standard Android “Settings tab”.
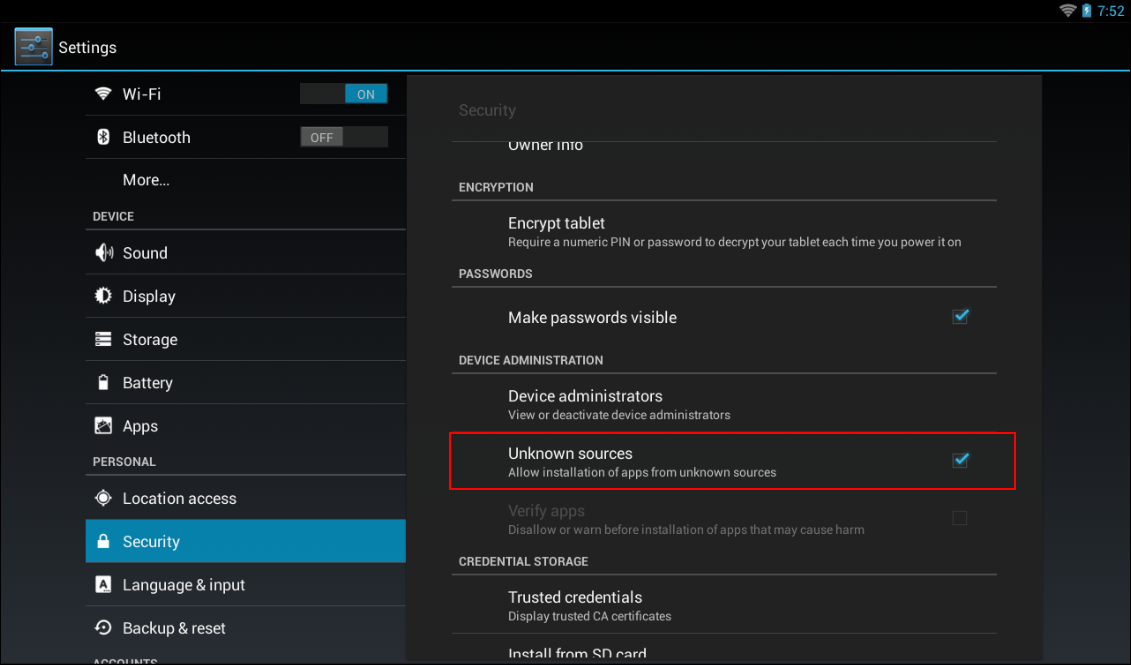
This setting should be disabled after installation unless auto-update is required (see Rooted Devices below for further information).
Enable the Wireless Adaptor
Xibo for Android will try to get the MAC Address of your Wireless Adaptor and record it in your CMS, but it can only do that if the Wifi Adaptor is enabled.
The first time you connect the Display you will need to have your Wireless Adaptor enabled. It is best to do this prior to installation so that you don’t have to leave Xibo for Android during configuration. After your Display is connected to the CMS you can turn the Wireless Adaptor off (unless you are using it of course!).
Date and Time
Confirm that the Date / Time and Timezone information are correctly set on the device. This information is used by Xibo for Android for time sensitive scheduling as well as for the 14-day trial.
Please note: If this is incorrectly set during installation your 14-day trial of Xibo for Android may expire sooner than it should.
Download and Install the Xibo for Android APK
Xibo for Android v3.x- as a minimum, Android 6 is required but we strongly recommend running on Android 7.1 or later.
Xibo for Android v2.x/1.8.x/1.7.x - as a minimum, Android 4.4 is required but we strongly recommend running on Android 7.1 or later regardless of version.
See Supported Versions and Environments for full details.
Xibo for Android is released as an APK file which can be opened and installed by the Android OS. You will need to download or transfer the latest Xibo for Android APK release file onto your device for installation.
The easiest way to do this is to select and download the latest release for your device directly from here: Downloads
To download and install to use Xibo for Android, you must agree to the End User Licence Agreement (EULA)
With the above preparation complete you should now have a device which can install non-market applications, with the Wifi Adaptor enabled, the correct Date/Time/Timezone and the latest Xibo for Android APK file downloaded onto the device.
Install the Xibo for Android APK
- Open the APK file and click to install.
Xibo for Android may require a number of permissions, which we have tried to keep to a minimum.
- Please accept any listed permissions and allow the installation to complete.
Xibo for Android will now be available in your app drawer.
Connect to your CMS
Open Xibo in the app drawer after installation and connect the Display using one of the two methods available:
- Use Code (available from v2 R204 and later for supported Android APK files)
or
- Manual Configuration (CMS Address and Key)
Use Code
- Click on Use Code to show a 6 character Activation Code. Ensure that the form remains open until you have entered the code in your Displays administration page and the Player launches automatically. Closing this form will hide the code and will stop the configuration.
- In the CMS navigate to the Displays page and click on the Add Display (Code) button at the top of the page.

- Enter the Activation Code as shown on the Player screen.
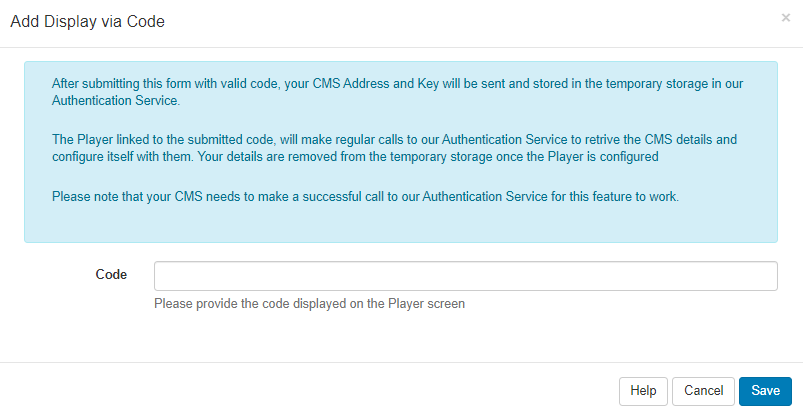
- Save.
Once successfully configured, the Activate Player page will automatically close.
The Display will be registered and awaiting authorisation.
Continue from the Display Authorisation section below.
Manual Configuration
- CMS Address - Enter the fully qualified address of your CMS installation. For example https://cms.example.org or http://example.org/cms
- CMS Key - The secret Key that will authenticate this Display with the CMS.
- Connect CMS - A message will be shown for the first successful connection, “Display is registered and awaiting authorisation from an administrator in the CMS”.
Assuming there are no errors with the communication between the CMS and the Player, the Display will be registered and awaiting authorisation as detailed in the Display Authorisation section below.
Display Authorisation
Before the Player can receive Scheduled Events and display your Layouts, you will need to Authorise the Display to connect to the CMS.
-
Log into your CMS and click on Displays from the main menu to see your newly registered Player in the list.
-
Click the row-menu for this Player and select Authorise from the list.
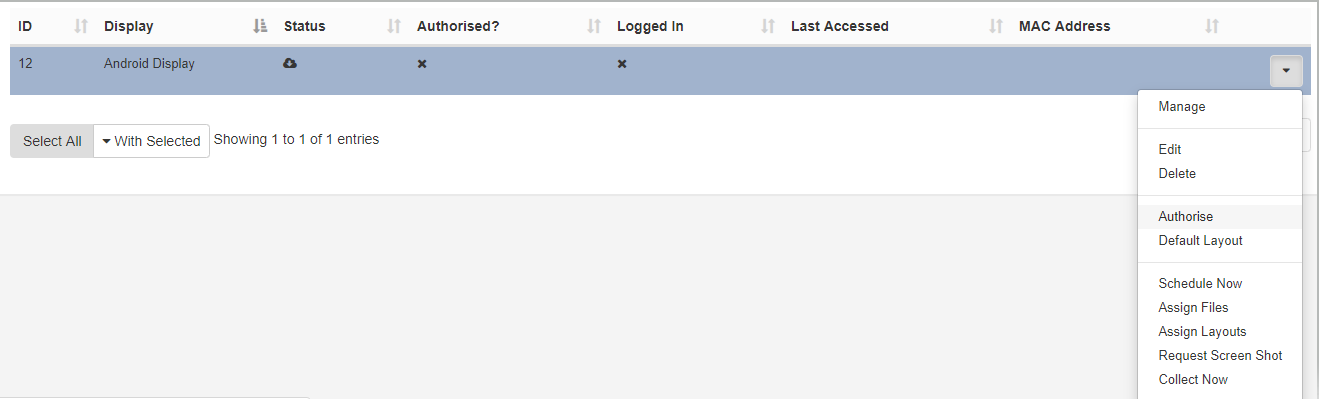
- Click Yes to confirm the authorisation of this Display.
At this point, you may want to select a Default Layout for your new Player to run.
Activate your Licence

On your Android display, use the Configuration Menu by accessing the 3 dot menu button in the top right of your device and click on Connect. You will be asked to confirm your CMS address and CMS Key and to Connect.
1.7 or later
If your CMS is 1.7 or later and you have provided the Licence Code for a Licence Pool as a Display Setting Profile in the CMS, Xibo will start immediately and download its content from the CMS. If you have not provided a Licence Pool Code, you will be taken to a page asking for this information on the device.
If you are using the free trial, “Skip” this step.
After either activating your licence or skipping to activate the trial, Xibo will start fully and download its content from the CMS.
CMS 1.6 or earlier
If your CMS is 1.6, you will be taken to a page asking for your Licence Pool Code / email address on the device.
If you are using the free trial, “Skip” this step.
After either activating your licence or skipping to activate the trial, Xibo will start fully and download its content from the CMS.
Display Setting Profiles
Default Profiles have been provided for you. You only need to create a Display Setting Profile if you want to override these defaults, or if you want to provide your Licence Pool Code to all of your devices centrally.
Rooted Devices
An Android device that has been rooted can take advantage of the auto-update functionality (available in 1.7 R53 and later).
Please note: If you’re using DSDevices hardware and have installed the DSDevices specific APK (as described in the installation steps above) then there is no need to root the device to take advantage of the automatic upgrade. You will need to ensure however that you always install/upgrade with the DSDevices specific version of Xibo for Android.
Requirements
- Xibo CMS 1.6.1 or higher
- Xibo for Android R53 or higher
- Android 4.1 or higher | Android 4.4 or higher from 1.8 R101
- Root access to the device (with SU or SuperUser installed)
Xibo for Android does require a number of permissions, which we have tried to keep to a minimum. Please accept the listed permissions and allow the installation to complete.
Xibo for Android will now be available in your app drawer as normal.
Preparing the device
The device should be prepared with root access and a suitable root manager application such as SuperUser. It should also have Xibo for Android R53 or higher installed and configured. For further information and general instructions, please see Rooting a Device.
Granting Root Access
The Xibo application should be granted root access to the device, which is done from the Settings menu.

Clicking or pressing on “Check root is available” will open a popup window, shown below, which will ask for a confirmation. At this point, Xibo will need permanent access to root so that no further user interaction will be required during the update process.
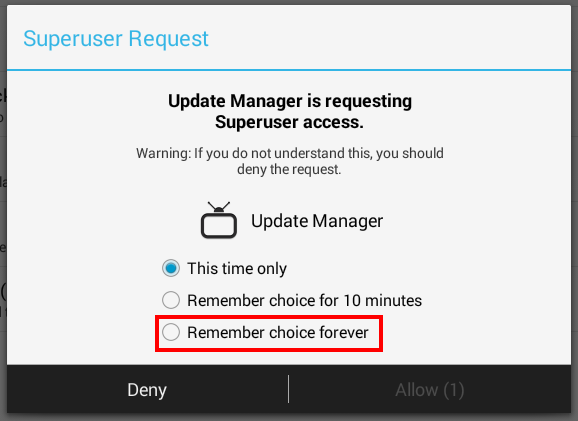
After selecting Allow a message will appear saying that Superuser access has been granted and the configuration for auto-update on the Player is complete.
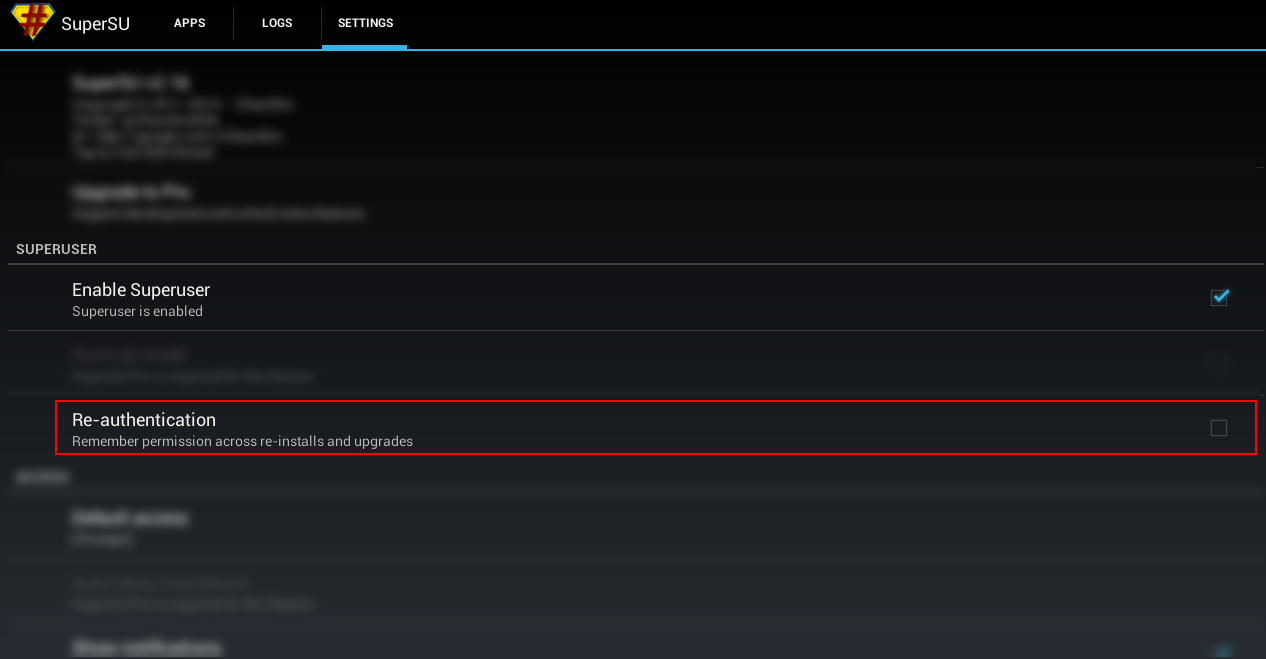
SuperSu
If you are using SuperSu you should ensure that the “Re-authentication” setting is disabled. Failure to disable this setting will mean that the application will lose root access after any upgrade.
Setting an upgrade window
If you want to set a particular time for the player application to upgrade you will need to create a Display Settings Profile in the CMS and assign it to the Display.
For further information regarding Upgrades, please see Upgrading Xibo for Android
