
Xibo on a Web server
On this page
Xibo on a Web server
Installing Xibo without Docker as a manual/custom installation requires a working knowledge of how to install, configure and maintain a web server.

Minimum Requirements
- MySQL 5.7
- A web server (nginx, apache, iis)
- PHP 8.1 (see php version below)
- PHP-CLI 8.1 (see php version below)
- URL Rewriting
- Virtual Hosts or dedicated web server (modify DocumentRoot)
- CRON/Scheduled Tasks
PHP version:
- The current stable release requires PHP 8.1 or later.
- PHP 7.0.8 or later can be used from Xibo 1.8.5.
- PHP 5.6 or later can be used until Xibo 2.2.0.
PHP modules:
- PHAR
- JSON
- GD
- DOM
- PDO
- PDO-MySQL
- Zip
- gettext
- Soap
- Curl
- Iconv
- Ctype
- File Info
- XML
- SimpleXML
- Mbstring
- zlib
- ZeroMQ
Prepare your Environment
To run without Docker it is necessary to ensure that the Environment is configured in a way that will run Xibo. There are several things to take into consideration, such as where to put the files, which web server to run, etc.
Placing CMS Files
Secure by design, the CMS has a folder structure which intends for only the web folder to be in a location served by the web server. This means the web server/hosting must allow files to be placed outside the web location.
There are several strategies for achieving this (this is not an exhaustive list):
1. Modify the DocumentRoot
If your document root is /var/www, copy the CMS into that folder and then modify the document root to be /var/www/web.
2. Use a symlink
If your document root is /var/www , copy the CMS into a different folder (for example /home/user/xibo-cms ) and then create a link between /home/user/xibo-cms/web and /var/www/web . Change the ownership of /home/user/xibo-cms/web to www-data (or the user your web server runs under).
3. Use a Virtual Host
A virtual host may be used:
<VirtualHost *:80>
    DocumentRoot "/var/www/web"
    ServerName www.example.com

    # Other directives here
    AllowOverride All
    Options Indexes FollowSymLinks MultiViews
    Order allow,deny
    Allow from all
    Require all granted
</VirtualHost>
Any Virtual Host configuration that points to the /web folder of the release archive and enables the .htaccess file is sufficient.
4. Use an Alias
The CMS can be run under an alias - this is an example for Apache:
Alias /xibo "/home/user/xibo-cms/web"

<Directory "/home/user/xibo-cms/web">
    AllowOverride All
    Options Indexes FollowSymLinks MultiViews
    Order allow,deny
    Allow from all
    Require all granted
</Directory>
URL Rewriting
The CMS should be run on a web server that supports URL rewriting. If this is not possible you will need to access the application by specifying index.php in the URL.
Apache
A .htaccess file has been provided in web/.htaccess . This file assumes that the CMS is being served from the web server document root or from a virtual host.
Rewrite Rules with an Alias
If an alias is required then the .htaccess file will need to be modified to include a RewriteBase directive that matches the alias.
For example, if the alias is /xibo the .htaccess should have: RewriteBase /xibo .
nginx
A sample nginx config is provided below:
location / {
    try_files $uri /index.php?$args;
}

location /api/authorize {
    try_files $uri /api/authorize/index.php?args;
}

location /api {
    try_files $uri /api/index.php?$args;
}

location /install {
    try_files $uri /install/index.php?$args;
}

location /maint {
    try_files $uri /maint/index.php?$args;
}

location /maintenance {
    try_files $uri /index.php?$args;
}
IIS
IIS includes a function to convert from .htaccess which creates the correct configuration for IIS. However, the error message Error IIS MAP RewriteRule .* - [E=HTTP_AUTHORIZATION:%{HTTP:Authorization}] may be received.
This rule is incompatible with IIS and can be removed.
After import, the following content will be inserted into the web.config file.
<system.webServer>
    <rewrite>
        <rules>
            <rule name="Imported Rule 1" stopProcessing="true">
                <match url="^" ignoreCase="false" />
                <conditions logicalGrouping="MatchAll">
                    <add input="{REQUEST_FILENAME}" matchType="IsFile" ignoreCase="false" negate="true" />
                    <add input="{URL}" pattern="^.*/authorize/.*$" ignoreCase="false" />
                </conditions>
                <action type="Rewrite" url="api/authorize/index.php" appendQueryString="true" />
            </rule>
            <rule name="Imported Rule 2" stopProcessing="true">
                <match url="^" ignoreCase="false" />
                <conditions logicalGrouping="MatchAll">
                    <add input="{REQUEST_FILENAME}" matchType="IsFile" ignoreCase="false" negate="true" />
                    <add input="{URL}" pattern="^.*/api/.*$" ignoreCase="false" />
                </conditions>
                <action type="Rewrite" url="api/index.php" appendQueryString="true" />
            </rule>
            <rule name="Imported Rule 3" stopProcessing="true">
                <match url="^" ignoreCase="false" />
                <conditions logicalGrouping="MatchAll">
                    <add input="{REQUEST_FILENAME}" matchType="IsFile" ignoreCase="false" negate="true" />
                    <add input="{URL}" pattern="^.*/install/.*$" ignoreCase="false" />
                </conditions>
                <action type="Rewrite" url="install/index.php" appendQueryString="true" />
            </rule>
            <rule name="Imported Rule 4" stopProcessing="true">
                <match url="^" ignoreCase="false" />
                <conditions logicalGrouping="MatchAll">
                    <add input="{REQUEST_FILENAME}" matchType="IsFile" ignoreCase="false" negate="true" />
                    <add input="{URL}" pattern="^.*/maint/.*$" ignoreCase="false" />
                </conditions>
                <action type="Rewrite" url="maint/index.php" appendQueryString="true" />
            </rule>
            <rule name="Imported Rule 5" stopProcessing="true">
                <match url="^" ignoreCase="false" />
                <conditions logicalGrouping="MatchAll">
                    <add input="{REQUEST_FILENAME}" matchType="IsFile" ignoreCase="false" negate="true" />
                </conditions>
                <action type="Rewrite" url="index.php" appendQueryString="true" />
            </rule>
        </rules>
    </rewrite>
</system.webServer>
ZeroMQ
ZeroMQ is a low level library used by Xibo to manage push messaging between the CMS and Players. The ZeroMQ PHP bindings are required for this to function. XMR will not run without ZeroMQ installed.
Installation of the ZeroMQ bindings can be complicated - we’ve included an example of installation on Ubuntu 14.04.
Install the ZeroMQ core and PHP bindings from PPA
Installation via apt-get .
sudo add-apt-repository ppa:chris-lea/zeromq
sudo add-apt-repository ppa:alexharrington/php-zmq
sudo apt-get update
sudo apt-get install php5-zmq
Install the ZeroMQ PHP bindings manually
If you can’t install from the PPA directly, then you can do the following to install the zmq extension.
Installation via PECL .
sudo add-apt-repository ppa:chris-lea/zeromq
sudo apt-get install libzmq3 libzmq3-dev libzmq3-dbg pkg-config php5-dev build-essential php-pear
sudo pecl install zmq-beta
Add the extension=zmq.so directive to your php.ini file and restart your web server.
Release Download
The latest release can be downloaded from the release archives page on GitHub.
Installation
Beyond this point, it is assumed that a web server running with PHP and MySQL is available and that the compressed archive (ZIP or Tarball) of the CMS installation package has been transferred to the server.
The installation process flow:
- Download and extract the archive
- Start the Installation
- Pre-requisites
- Create the database
- Database details
- Start the Installation
- Final Configuration
- Install XMR
- Configure XTR
- Complete
Download and extract the archive
The CMS archive contains a subfolder called Xibo-cms-(version), the contents of this folder should be copied into an appropriate location on your web server. It is strongly recommended that the folder is extracted in a non-webservable location. On a dedicated server the DocumentRoot should point to /path/to/Xibo]-folder/web .
The extracted archive should look like the below screenshot:
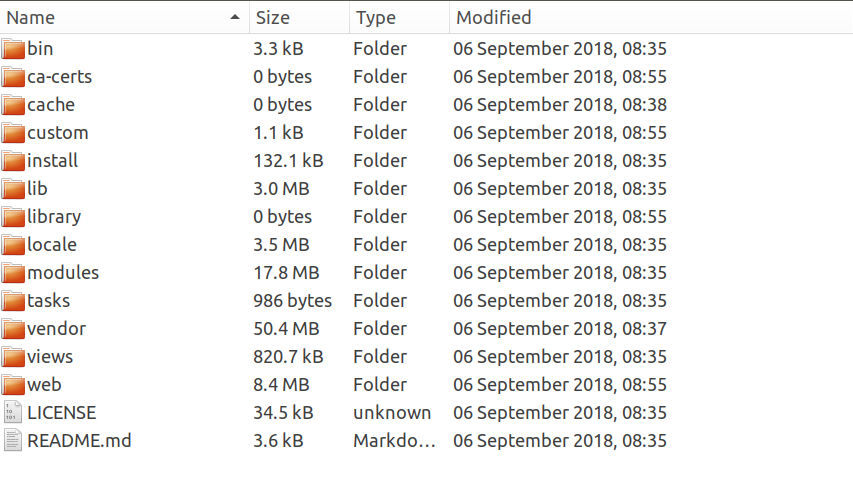
A folder is provided for the Xibo Library which will be used to store images, videos and other files. This folder can be moved to another location and changed during the install process.
Starting the Installation
- Navigate to
http://localhostto automatically start the installation.
The installation is in a wizard format which will guide the installer through the process of installing Xibo.
Pre-requisites
The installer contains a detailed checklist of all the items required for a successful installation. Each item will have either:
- A tick - the item is present and correct
- An exclamation mark - the item is present but may not be configured correctly.
- A cross - the item is missing.
Any items with an exclamation mark or a cross should be addressed and the retest button used to run this step again.
- Once all the items are ticked press Next to advance.
Creating the database
The CMS can install into a new database or an existing one.
Xibo does not prefix its table names and may conflict with content in an existing database.
The choice for a new or existing database can be made by switching between the two available tabs.
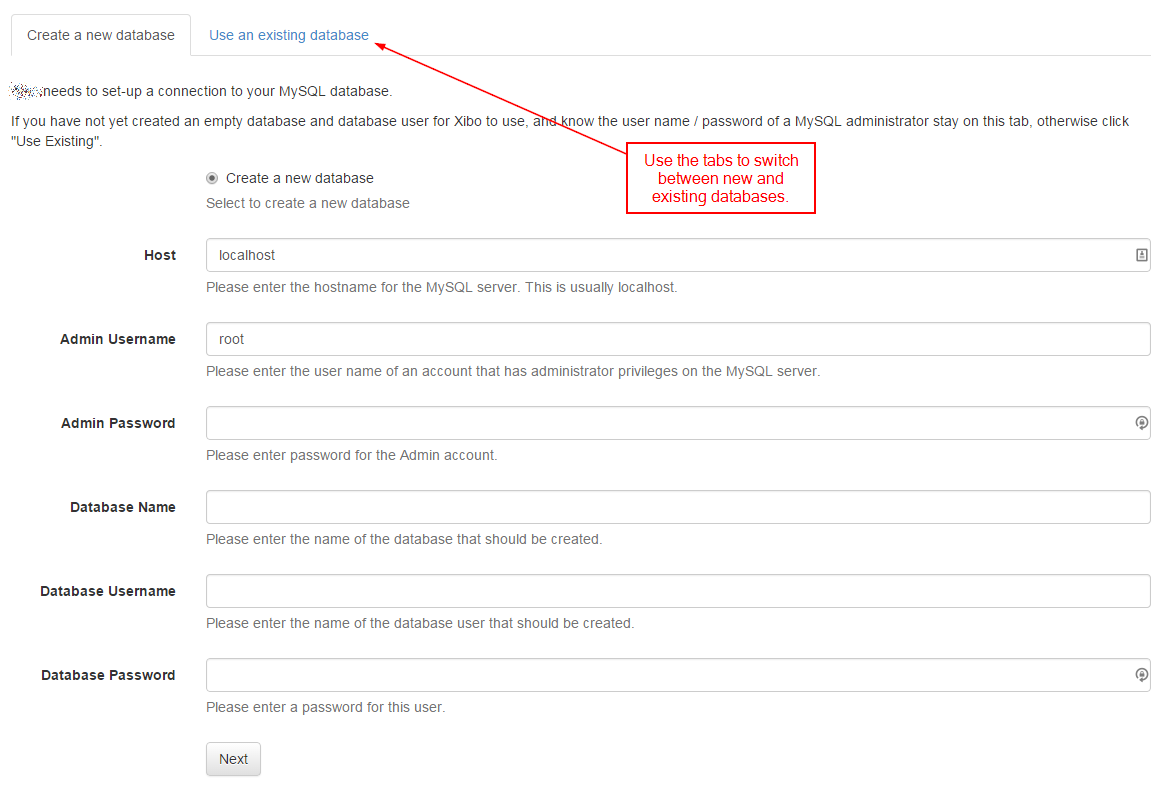
Database Details
Whether you chose an existing database or a new one, the installer will need to collect some information about that database to allow the CMS to connect, read and write.
The installer will need the following information:
- Host - The hostname for your MySQL installation - in the majority of cases this will be “localhost”.
- Admin Username - The “root” username for your MySQL installation. This is only used for the installation and is only required if you have asked the installer to create a new database.
- Admin Password - The “root” password. This is only used for the installation and is only required if you have asked the installer to create a new database.
- Database Name - The name for the CMS database.
- Database Username - The username for the CMS to use to connect to the database - usually this can be the same.
- Database Password - The password to use to connect to the database.
Start the Installation
The installer will now create/populate the database for Xibo.
You should see a series of dots appear on the screen as this happens. It can take a few moments to complete.
- Assuming everything went well, click Next.
Admin Password
Each installation will require at least one Super User level Administrator to manage the system, apply upgrades and configure the advanced settings.
- The installer will prompt for the creation of this user at Step 3.

This username and password should be kept safe as it will be required when the installation is complete.
Settings
The next screen deals with configuring Xibo:
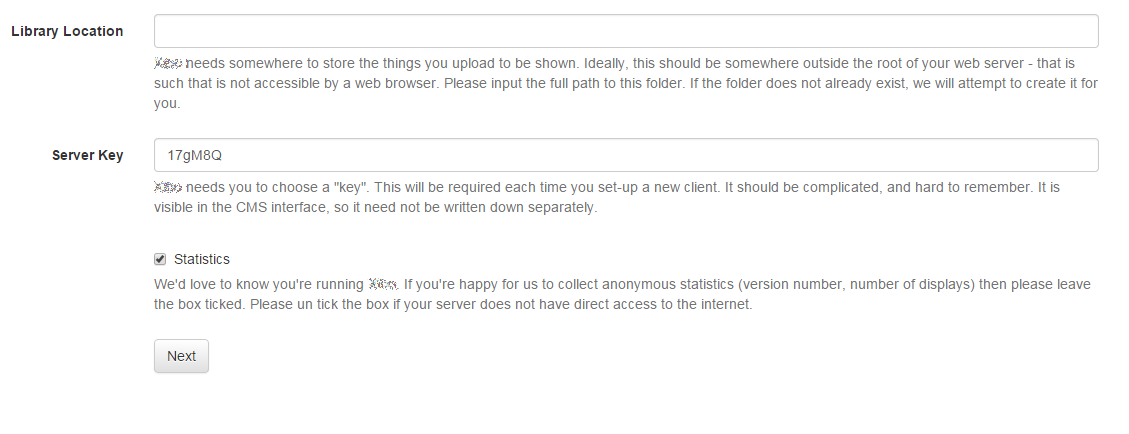
- The first field asks for the Library Location that Xibo should store the media you upload. The release archive included a folder for this,
/libraryor a different folder can be used. Enter that folder here e.g/var/www/Xibo/library. - The next field asks for a CMS key which is used to authenticate Displays with the CMS and should be something obscure.
- The final tick box asks if it’s OK to send anonymous Statistics back to the Xibo project. We would be very happy if you did!
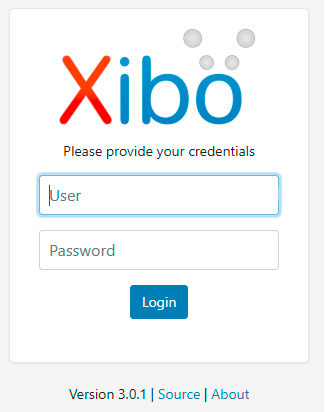
Complete
The installation is now complete and the system is ready to log in.
After installation
The CMS requires a pub/private RSA keypair and an encryption key to be saved in the library folder.
As you’re installing manually you’ll need to provide these yourself. You can override the generated keys paths and encryption key by providing an alternative in settings-custom.php.
For example:
$apiKeyPaths = [
    'publicKeyPath' => '/var/www/cms/custom/public.key',
    'privateKeyPath' => '/var/www/cms/custom/private.key',
    'encryptionKey' => ''
];
Generating keys
Public/Private RSA keys can be generated as below:
openssl genrsa -out /var/www/cms/library/certs/private.key 2048
openssl rsa -in /var/www/cms/library/certs/private.key -pubout -out /var/www/cms/library/certs/public.key
The encryption key as below:
php -r 'echo base64_encode(random_bytes(32)), PHP_EOL;' >> /var/www/cms/library/certs/encryption.key
Any valid method for creating keys can be used.
XTR - Routine Tasks
XTR is Xibo’s task scheduler and caters for running Routine Tasks on the CMS. Typical tasks include Maintenance, Email Alerts, Archiving and 3rd party integrations.
Tasks are run by a php script which is scheduled to run with either CRON, Task Scheduler or the equivalent system on your OS.
Prerequisites
The operating system the CMS is installed on must have a task scheduler and must have access to a PHP Command Line (CLI).
In addition, in order to send email notifications, the PHP CLI must have a working mail() command. You need to ensure your PHP installation is configured to send mail via a local or remote SMTP server.
Tasks are run in parallel for maximum efficiency and therefore the system must support pcnt_fork.
Configuration
This section is broadly based upon the Moodle Cron documentation available here. Most unix-based servers run a version of cron. Cron executes commands on a schedule.
Modern Linux distributions use a version of cron that reads its configuration from /etc/crontab. If you have an /etc/crontab, edit it with your favourite editor, otherwise, run the following to edit the crontab:
crontab -e
and then add:
* * * * * /usr/bin/php /var/www/xibo/bin/xtr.php
The first five entries are the times to run values, followed by the command to run. The asterisk is a wildcard, indicating any time.
Importantly the xtr.php file must be run by a user which can share files with the user account your web server runs under. If you run crontab -e you will need to do so as ‘said user’, and if you edit /etc/crontab you can specify the user in the task.
* * * * * www-data /usr/bin/php /var/www/xibo/bin/xtr.php
This is because XTR may update cached files.
There are CRON resources available online which may be useful:
For beginners, “EDITOR=nano crontab -e” will allow you to edit the crontab using the nano editor. Ubuntu defaults to using the nano editor.
Usually, the “crontab -e” command will put you into the ‘vi’ editor. You enter “insert mode” by pressing “i”, then type in the line as above, then exit insert mode by pressing ESC. You save and exit by typing “:wq”, or quit without saving using “:q!” (without the quotes). Here is an intro to the ‘vi’ editor.
Windows Scheduled Task
This section is broadly based upon the Moodle Cron documentation available here.
- Find the php.exe or php-win.exe program on your server. It will be in your PHP installation directory.
- Setup a Scheduled Task
- Go to Start -> Control Panel -> Scheduled Tasks -> Add Scheduled Task.
- Click Next to start the wizard:
- Click the Browse… button and browse to your php.exe or php-win.exe and click Open
- Type Xibo Maintenance as the name of the task and select Daily as the schedule. Click Next
- Select 12:00 AM as the start time, perform the task Every Day and choose today’s date as the starting date. Click Next
- Enter the Username and Password of the User the task will run under (it does not have to be a privileged account at all). Make sure you type the password correctly. Click Next
- Mark the checkbox titled Open advanced properties for this task when I click Finish and click Finish.
- In the new dialogue box, type the following in the Run: text box:
c:\php\php-win.exe -f c:\path\to\Xibo\xtr.php
Replace secret with your Maintenance Key if you are running in Protected Mode.
- Click on the Schedule tab and there in the Advanced… button
- Mark the Repeat task checkbox and set Every: to 1 minute, and set Until: to Duration and type 23 hours and 59 minutes
- Click OK
- Test your scheduled task
You can test that your scheduled task can run successfully by clicking it with the right button and choosing Run. If everything is correctly set up, you will briefly see a DOS command window while php executes and fetches the cronpage and then it disappears. If you refresh the scheduled tasks folder, you will see the Last Run Time column (in detailed folder view) reflects the current time, and that the Last Result column displays “0x0” (everything went OK). If either of these is different, then you should recheck your setup.
Trouble running via CRON / Scheduled Tasks?
Users that cannot run CRON will not be able to run tasks, however, it is important the maintenance still be run in these cases.
For this purpose, the Maintenance Routes are available via the web address at http://<host>/maint?key=changeme.
Accessing over the web route will require a key, which is configured via the Settings page under the Administration section of the main CMS menu from the Maintenance tab:
- Enable Maintenance?
- Maintenance Key
The key is required if Enable Maintenance is set to Protected, which is strongly recommended. Further information is available from the Maintenance section.
XMR - Push Messaging
XMR for short is the Xibo Message Relay which is responsible for pushing messages from the CMS to the Players. XMR is used for any Player Actions that need to be taken immediately.
Mile-high Overview
XMR is a message queuing application and comes in two parts, one handles the CMS -> XMR communication and the other the XMR -> Player communication. Therefore it must listen on two ports.
The CMS -> XMR section is a request/response queue and the XMR -> Player section is a publisher/subscriber queue.
Installation
Please make sure ZeroMQ is installed and enabled.
XMR is included in the vendor/bin folder of your CMS installation and requires a config.json file to be written to that folder before use.
The config.json is very simple:
{
  "listenOn": "tcp://localhost:50001",
  "pubOn": ["tcp://your_ip:9505"],
  "debug": false
}
-
listenOnis the XMR Private Address for CMS -> XMR communication -
pubOnis the XMR Public Address for XMR -> Player communication -
debugdetermines the level of debug messaging output and whether the output goes to the console (false = no)
XMR is a PHAR (PHP archive) and can be run from any terminal by issuing php xmr.phar. It is a long-running application and will not terminate once started. It is recommended to run this as a service, you can find an example upstart conf file in vendor/xibosignage/xibo-xmr/bin/upstart.
CMS Configuration
The CMS must be configured to talk to an XMR instance if player actions are required.
The CMS has settings for from the Displays tab of the Settings page, under the Administration section of the main CMS menu. There are two settings:
-
XMR Private Address - this is the
listenOnaddress for CMS -> XMR communication -
XMR Public Address - this is the
pubOnaddress for XMR -> Player communication
Adjust the XMR public address of the CMS:
- Navigate to the Settings page under the Administration section of the CMS main menu and select the Displays tab.
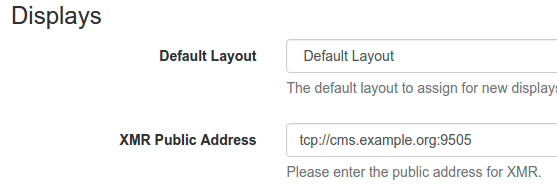
The XMR public Address field defaults to tcp://cms.example.org:9505 which needs to be adjusted to be suitable for your network.
- The format of the address needs to be:
tcp://<ip_address>:<port>
- The default
<port>is 9505 and should be set to that unless you have specified a custom port in your docker-compose configuration.
If your CMS is available by a DNS name - for example, if your CMS web page is available at https://mydomain.com, then simply swap cms.example.org for mydomain.com . If your CMS is only available by an IP address, then enter the IP address instead.
Security
XMR only handles encrypted messages.
When Players register with the CMS they generate a public/private key and send the public key to the CMS. All messages running through XMR are encrypted using the public key of the display they are intended to reach. This happens in the CMS and therefore XMR only receives encrypted messages.
The CMS -> XMR listenOn address should be private to your internal network.
Multiple CMS installations
XMR can service multiple CMS installations - it is CMS agnostic as the message encryption ensures that only the intended recipient of a message can read it.
Backing up your CMS/Database
You will need to backup your Xibo CMS files and Library and create a dump of the database with mysqldump or a similar tool.
How you opt to make regular backups is left as an exercise for each Administrator.
Here are some links to utilities that may be of use: duplicati - Windows/Linux duplicity GUI backup application duply - Linux duplicity command line backup application
Library and Bandwidth Limits
Manage limits on the library file size and monthly bandwidth usage.
- This is done by virtue of two settings in the database table; (LIBRARY_SIZE_LIMIT_KB & MONTHLY_XMDS_TRANSFER_LIMIT_KB)
If no limits are entered in the database, everything continues to work without restriction; however once a limit is entered Xibo will start validating against these limits, and when they are exceeded will prevent the upload of new media/updates to Players.
However, these two settings are currently not available through the user interface; only the statistical data is shown.
